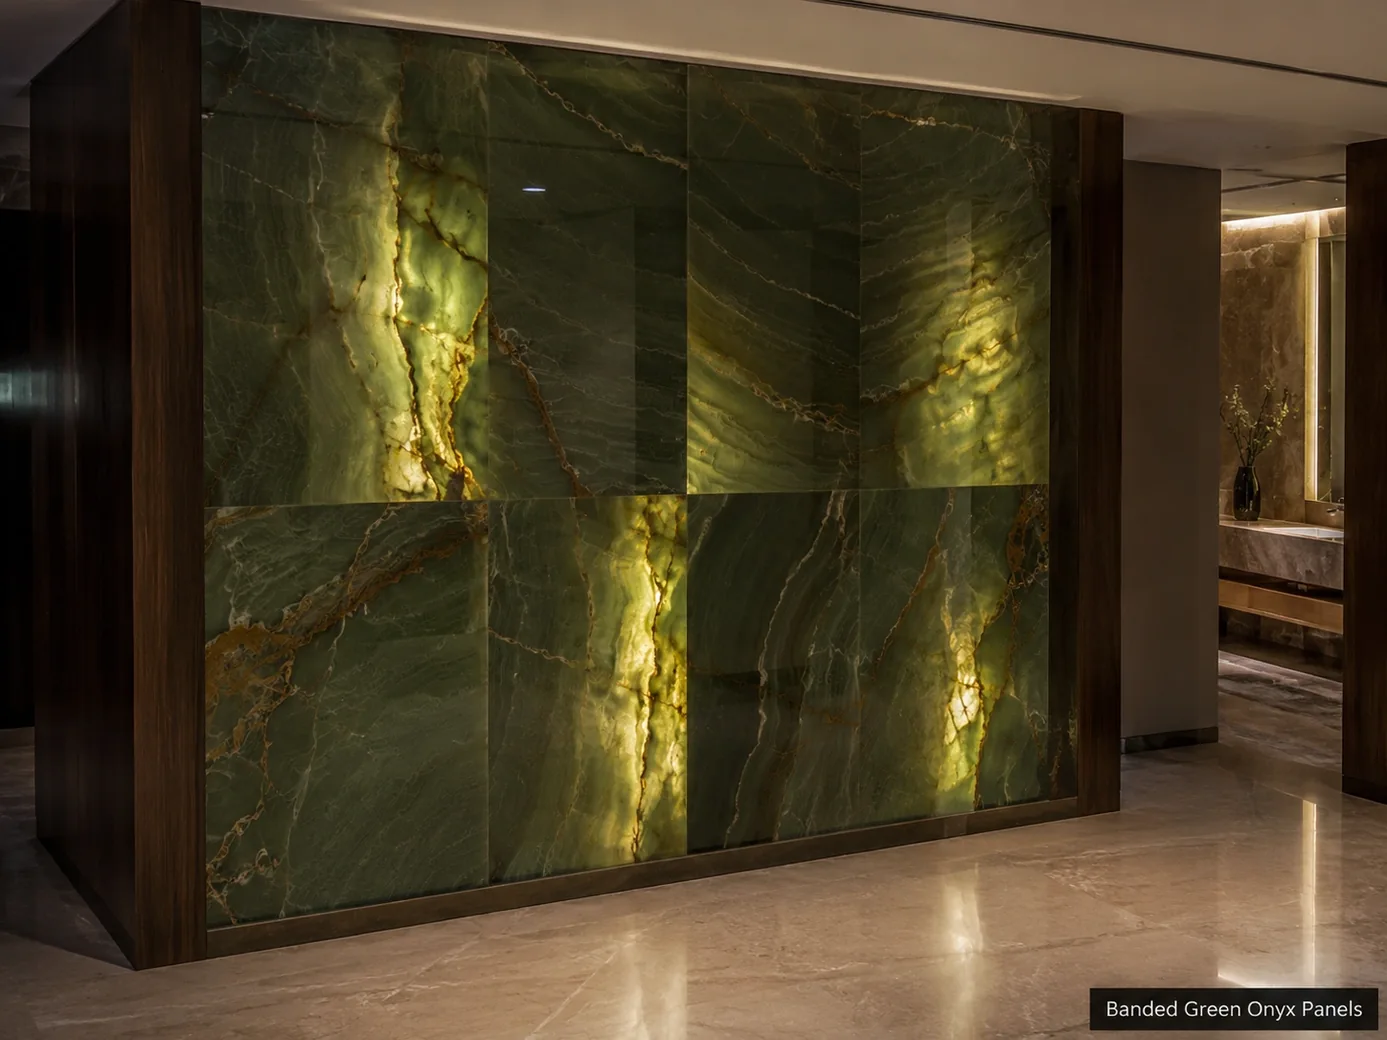
Natural onyx wall panels can be illuminated from behind because many varieties transmit light. Standard decorative cladding may be around 15–20 mm, while thinner laminated backlit systems can use approximately 5–10 mm of stone. Bathrooms are suitable when waterproofing and compatible fixing materials are correctly detailed. Panels may be mechanically fixed or bonded to engineered backings, with colour choices ranging from green and honey to white, pink, amber, blue and brown.
Translucent Wall Features
Onyx Wall Panel Small
Secure product inquiry
Buy now
Cash on delivery available. Product details are pre-filled below. Owner delivery adds AED 5,000.
Panel Backing & Lighting Access
Natural and Engineered Choices for Luminous Walls
A 60 × 120 × 1.5 cm natural onyx panel may be bonded directly within an engineered system or laminated to glass or lightweight honeycomb for additional support. Backlit installations need removable access to LEDs and drivers instead of permanently trapping the lighting behind the stone. Moisture suitability also depends on the complete backing, adhesive, joint and waterproofing specification.
Luminous Wall Cladding
Natural Green Onyx Wall Panel Construction
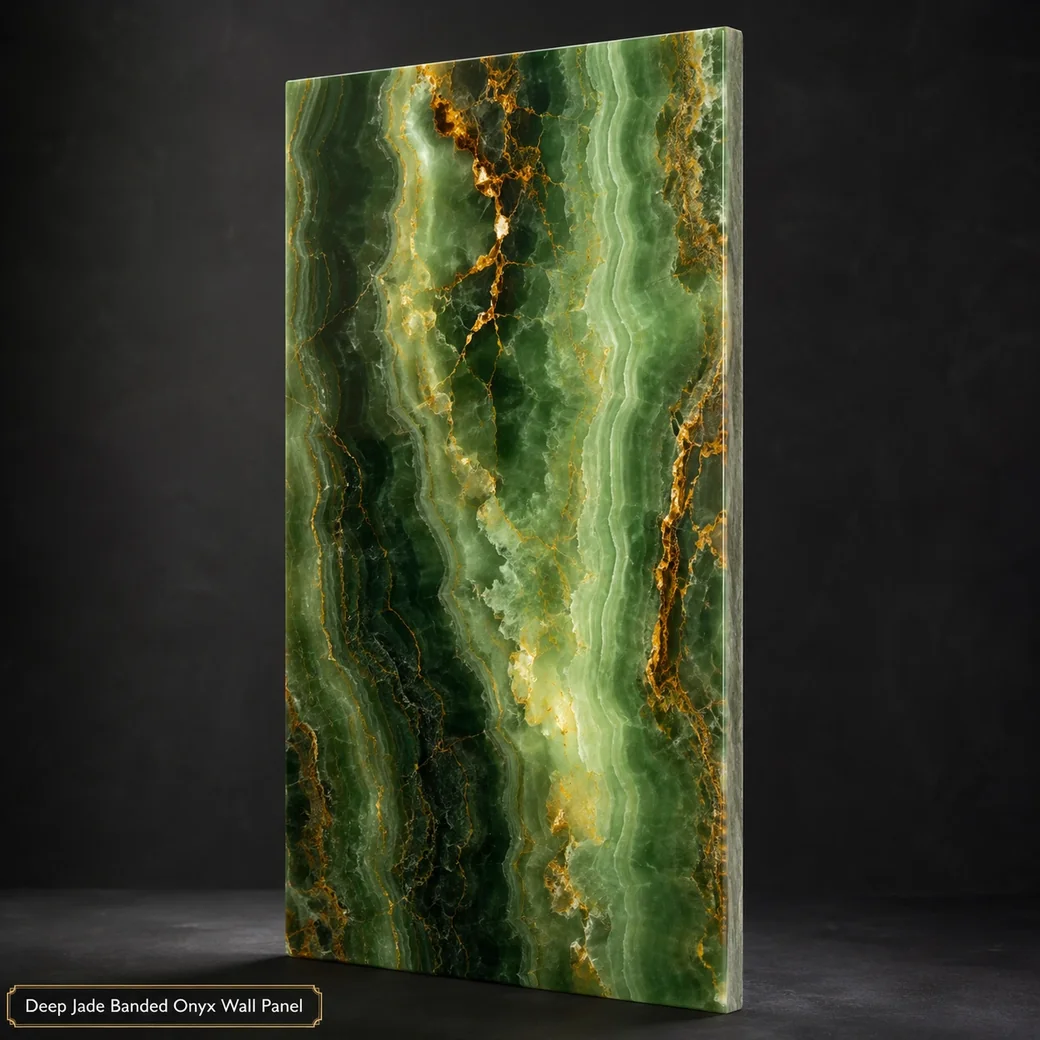
A Natural Green Onyx Wall Panel made from Banded Calcite Onyx has a polished deep-jade surface crossed by rust-gold veins, giving the stone both strong color and natural translucent depth. Full natural onyx panels preserve the true mineral structure and vein variation, while laminated systems use a thinner genuine stone layer bonded to a supporting material for reduced weight or improved stability. Artificial translucent panels can simulate the appearance of illuminated onyx using resin or composite materials, but they lack the natural fissures, mineral banding and one-of-a-kind variation of genuine calcite stone.
Panel System Design
Backlit Onyx Wall Cladding Thickness and Installation
At 60 × 120 × 1.5 cm and 29.2 kg, the onyx wall panel requires a backing and fixing strategy capable of supporting both the stone weight and any backlighting cavity. Engineered glass or honeycomb backing can improve stability in illuminated assemblies, while adhesive fixing may suit properly prepared supported panels and mechanical restraint is preferable where size, weight or project conditions demand additional security.
Translucent Onyx Wall Glass and Honeycomb Systems
An engineered backing can strengthen the 15 mm onyx panel and support illuminated installations, but it must remain compatible with the fixing and moisture-control system.
Green Onyx Feature Wall LED Integration
Use concealed diffused lighting behind the panel so jade and rust-gold bands illuminate gradually rather than revealing individual LED sources.
Natural Onyx Bathroom Panel Detailing
Bathroom use requires waterproofing behind the onyx, moisture-compatible fixing materials and sealed joints rather than relying on the polished panel as the waterproof layer.
Product Overview
Jade Onyx Panel Product Details
This polished Banded Calcite Onyx panel has deep jade-green colouring with rust-gold veins, measures 60 × 120 × 1.5 cm and weighs 29.2 kg. It is compatible with backlighting and bathroom use when properly detailed, while the exact backing and mounting system are not specified.
| Panel Joint Width | 3 mm nominal panel joint |
|---|---|
| Kerf Detail | Approx. 4 mm-wide × 6 mm-deep concealed edge kerf in reinforced zones for engineered stainless-steel clips |
| Backing Panel Material | 12 mm aluminium-honeycomb backing panel bonded with a stone-compatible, non-staining structural epoxy |
| Diffuser Gap | Approx. 40–50 mm clear gap between the LED diffuser and the rear surface of the onyx |
| LED Pitch | Approx. 50 mm centre-to-centre LED pitch for uniform illumination without visible hotspots |
| Service Cavity Depth | Minimum 100 mm service-cavity depth behind the onyx assembly for LEDs, diffuser, wiring and ventilation |
| Waterproofing Connection Detail | Terminate the membrane behind the supporting frame with compatible sealed collars at all fixings and an upturned waterproofing connection at the panel base |
| Edge Return Detail | 45° mitred onyx edge with a minimum 50 mm return, colour-matched epoxy joint and continuous illuminated backing |
| Corner Joint Type | 45° mitred corner joint bonded with clear or colour-matched non-yellowing epoxy |
| Anchor Spacing | Concealed stainless-steel anchors at maximum 600 mm centres along support rails and within approximately 150 mm of panel corners |
Service & Moisture
Maintaining a Backlit Natural Onyx Wall
In bathrooms, waterproofing must continue behind the complete onyx assembly with sealed penetrations and carefully detailed joints. Preserve service access to LEDs and drivers, keep lighting components ventilated and clean the polished calcite surface with a soft cloth and pH-neutral product only.
Architectural Impact
Why Choose Translucent Green Onyx Cladding
Translucent green onyx cladding offers four project benefits: it creates continuous decorative wall surfaces, it can be illuminated from behind, thinner laminated systems can reduce the amount of stone required, and panels can be mechanically fixed or bonded to engineered backing systems. This makes the material suitable for feature walls, reception areas and selected bathrooms with correct waterproofing.
- Natural Translucent Finish
The polished onyx finish preserves natural translucency, allowing backlighting to illuminate jade, rust and gold mineral movement.
- Custom CNC Shapes
CNC fabrication can cut onyx panels into custom shapes, openings and profiles for project-specific wall installations.
- Backlit Wall Potential
The translucent panel can be backlit to reveal deeper jade, rust and gold mineral movement across the wall surface.
- Vein Matching Options
Adjacent panels can be selected and oriented to align green, rust and gold veining across a wider wall composition.
Bespoke Cladding
Custom Onyx Feature Wall Options
A custom onyx feature wall can combine cut-to-size panels, bookmatched slab layouts and laminated backing where reduced thickness or added reinforcement is required. CNC shaping, LED systems, driver access and joint locations should all be coordinated before fabrication, with the final installation method selected for the residential or hospitality substrate; comparable precision is needed when detailing a fabricated countertop drop edge.

Technical Reference
Banded Calcite Onyx Panel Specifications
Use the panel specifications to coordinate backing, fixing method, LED compatibility and wet-area requirements before the wall system is built. This is particularly important for bathrooms or illuminated installations where waterproofing, service access and structural support must be resolved behind the visible onyx.
Product details
Specifications, care, delivery and FAQ
Everything is rendered from product JSON fields so the page remains SEO-ready even before JavaScript runs.
Cleaning: Dust from top to bottom with microfiber, spot-clean polished onyx using a barely damp pH-neutral cleaner cloth, dry immediately, clean seams gently without flooding the backing, protect translucent areas from chemical residue, avoid acids abrasives steam and direct spraying
Daily Care: Dust from top to bottom with microfiber, remove fingerprints using a barely damp pH-neutral cleaner cloth, dry seams immediately, protect edges from impact, keep backlighting ventilation clear where applicable, avoid acids abrasives steam saturation and direct spraying
- Avoid fixing without full substrate support
- avoid acidic or abrasive cleaners
- avoid saturating joints
- avoid concentrated backlighting heat
- avoid drilling installed panels without checking concealed services
Maintenance: Dust with microfiber, spot-clean using a barely damp pH-neutral cleaner cloth, dry seams immediately, maintain backlighting ventilation, inspect anchors adhesive and joint sealant, protect corners from impact
Handling: Disconnect backlighting where applicable, support the complete panel on a rigid frame, carry vertically with multiple handlers, pad all edges, use compatible suction lifters, never apply point pressure to translucent zones
Where should bookmatched joints be positioned on a large illuminated Green Onyx feature wall so the natural bands align symmetrically without awkward breaks around corners, outlets or fixtures?
Establish the feature wall’s visual centre first and place the primary bookmatched joint on that centreline or another dominant architectural axis. Shift secondary joints toward corners, cabinet edges or changes in plane, and avoid slicing the mirrored focal pattern through outlets, switches or fixtures. Digitally compose every illuminated slab—including return panels—before fabrication, then adjust electrical locations where possible. Reserve full-width matching pieces for the central field and position naturally darker or less continuous areas near peripheral zones where symmetry is less critical.
How can the LED drivers remain accessible for replacement after this backlit onyx wall panel has been permanently installed?
Design the backlit wall as a serviceable cassette rather than permanently sealing every component. Place LED drivers in an adjacent cabinet, ceiling access panel, ventilated service cavity or removable base unit, then route low-voltage wiring to the panel. If drivers must sit behind the onyx, provide labelled removable sections secured mechanically rather than bonded permanently. Maintain ventilation and sufficient cable length for replacement. Photograph and document every driver, connector and access route before the 29.2 kg panel is installed.
What continuous waterproofing membrane and sealed penetration details are required behind this onyx wall panel in a bathroom?
Install a continuous wet-area waterproofing membrane behind the onyx, with reinforced corners and sealed transitions to the floor, ceiling and adjacent finishes. Pipe, fixing and electrical penetrations require compatible collars or liquid-applied detailing, while panel joints and edges need suitable sealant; onyx and grout must not serve as the waterproof barrier.
Should the 15 mm Green Onyx Wall Panels be fully bonded to an engineered backing, mechanically supported, or installed with both systems for long-term safety?
For long-term safety, a 15 mm, 29.2 kg Green Onyx Wall Panel should normally use both continuous bonding to a stable engineered backing and concealed mechanical support sized for the panel load and installation height. Adhesive distributes the load and prevents vibration, while mechanical clips or anchors provide secondary restraint; the precise system must be engineered around the onyx’s fissures, substrate, wet-area conditions and whether rear illumination is required.
How much perimeter and intermediate movement clearance should remain around an onyx wall panel to accommodate substrate movement without stressing or cracking the stone?
Provide a flexible perimeter joint rather than hard-grouting the panel tightly against walls, ceilings or adjacent materials; approximately 3–6 mm is common for interior panels, but size must follow panel dimensions and movement calculations. Larger installations need intermediate movement joints aligned with the substrate and building joints, using non-staining sealant and backer rod rather than rigid filler.
Reviews
Reviews and new review submission
0.0 average rating from 0 reviews. New reviews are saved as pending until approved.
No approved reviews yet for this product. The review form is ready for buyer submissions.